If you utilize Survey123 without a local Survey123 website installation on an ArcGIS Enterprise platform using Integrated Windows Authentication (IWA), you may have noticed that the IWA log-in process doesn’t always go smoothly. Installing a local deployment of the Survey123 website, with the proper configurations, will create a more predictable log-in experience with Survey123 through IWA.
Follow the steps below to configure the Survey123 website on a local (physical or vm) server with IWA. This configuration will also allow log-in with built-in Portal accounts. The Survey123 website must be installed on a machine with ArcGIS Portal already installed and configured.
Configuration Steps
- Run Survey123 website installer (must be downloaded from My ESRI)
- Make a backup/copy of the config.json file at this location: C:\Program Files\ArcGIS\Survey123website
- Check Portal CORS on ArcGIS REST API. If no URLs are listed, you may continue with the installation.
- Log in to Portal, go to Organization > Settings > Security > Allow origins.
- In wwwroot folder (C:\inetpub\wwwroot), create folder called survey123.
- In the survey123 folder, create a file called web.config and paste the contents below:
<?xml version="1.0" encoding="UTF-8"?>
<configuration>
<system.webServer>
<rewrite>
<rules>
<clear />
<rule name="ReverseProxyHTML" stopProcessing="false">
<match url="(^$|.*\.html$)" />
<conditions logicalGrouping="MatchAll" trackAllCaptures="false" />
<action type="Rewrite" url="http://localhost:5080/{R:1}" />
<serverVariables>
<set name="HTTP_X_ORIGINAL_ACCEPT_ENCODING" value="{HTTP_ACCEPT_ENCODING}" />
<set name="HTTP_ACCEPT_ENCODING" value="" />
</serverVariables>
</rule>
<rule name="ReverseProxyInboundRule1" stopProcessing="true">
<match url="(.*)" />
<conditions logicalGrouping="MatchAll" trackAllCaptures="false" />
<action type="Rewrite" url="http://localhost:5080/{R:1}" />
</rule>
</rules>
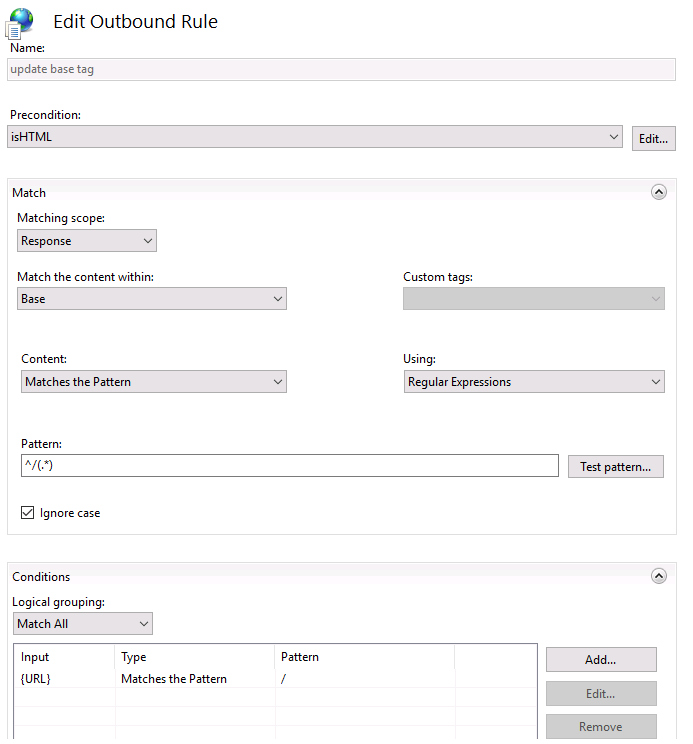
<outboundRules>
<rule name="update base tag" preCondition="isHTML">
<match filterByTags="Base" pattern="^/(.*)" />
<action type="Rewrite" value="/survey123/" />
<conditions trackAllCaptures="false">
<add input="{URL}" pattern="/" />
</conditions>
</rule>
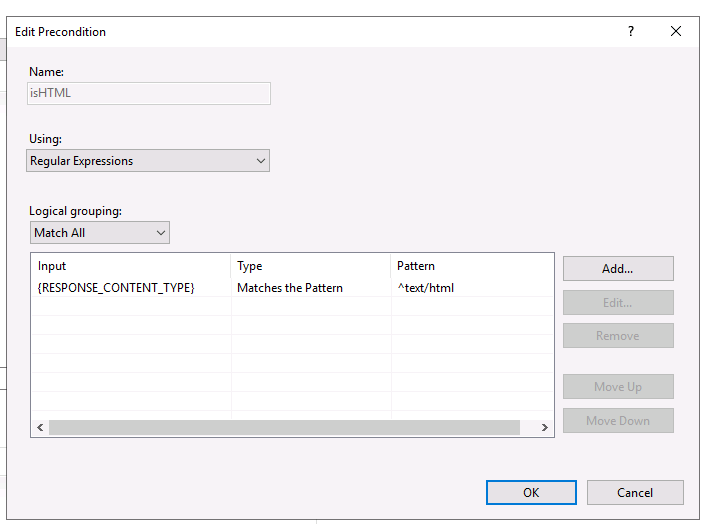
<preConditions>
<preCondition name="isHTML">
<add input="{RESPONSE_CONTENT_TYPE}" pattern="^text/html" />
</preCondition>
</preConditions>
</outboundRules>
</rewrite>
</system.webServer>
</configuration>
- Convert survey123 folder to an application in IIS (right click folder)
- Install URL rewrite module for IIS (download can be found here: https://www.iis.net/downloads/microsoft/url-rewrite)
- In the URL rewrite actions pane, click View Server Variables. If variables below already exist, skip to step 9.
- Click Add and add three variables
- HTTP_ACCEPT_ENCODING
- HTTP_X_ORIGINAL_ACCEPT_ENCODING
- HTTP_X_ORIGINAL_HOST
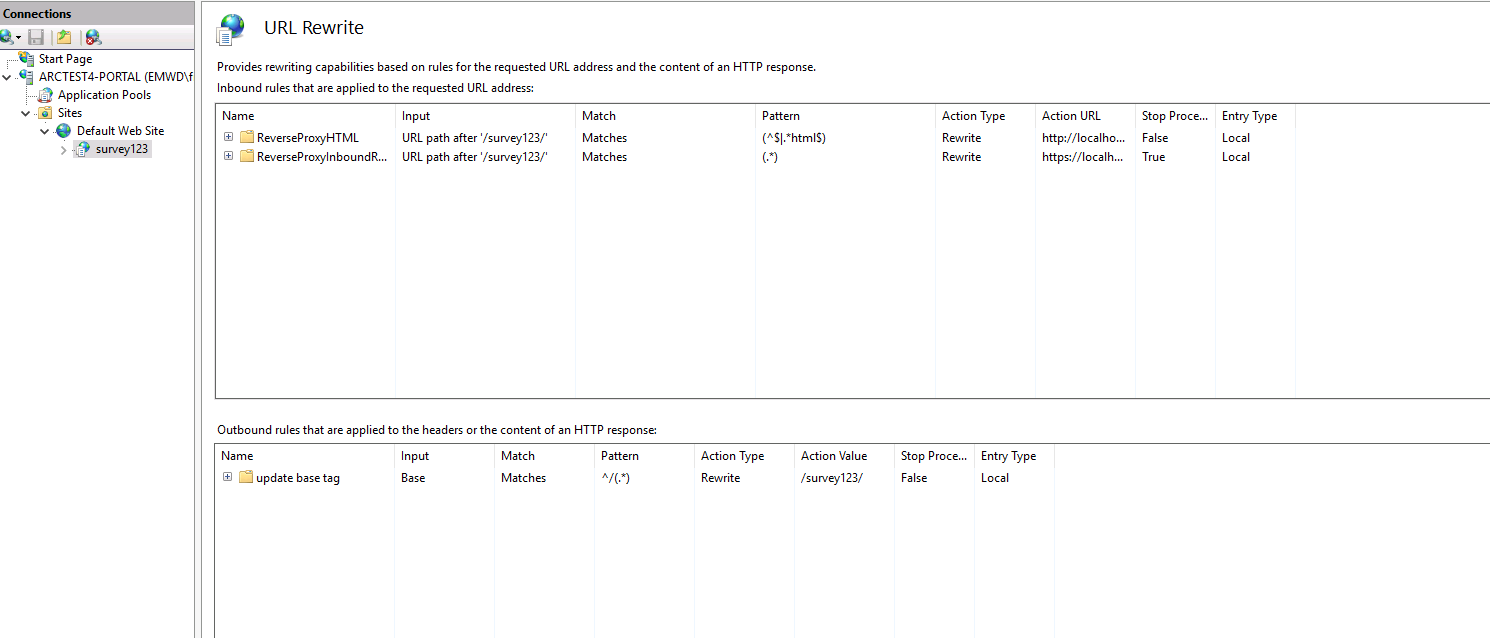
- Add rules to URL Rewrite module under actions (these should be inherited from web.config file)
- Choose inbound blank rule


- Create a 2nd inbound blank rule

- Add blank outbound rule
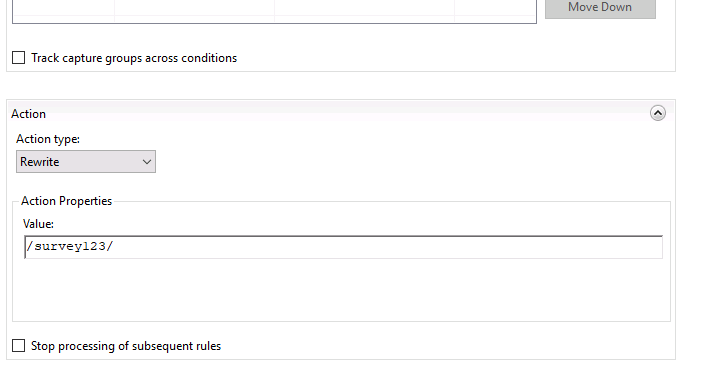
- IIS rewrite should now have these rules

- Install the IIS Application Request Routing module.
- Also, ensure the IIS Application Request Routing module is installed on the web server. Once installed, enable proxy functionality as it is disabled by default:
- Open IIS Manager on the web server,
- Select your server from the tree view on the left.
- Double-click Application Request Routing.
- Select Server Proxy Settings from the Actions window on the right.
- Check the Enable Proxy checkbox, and click Apply.
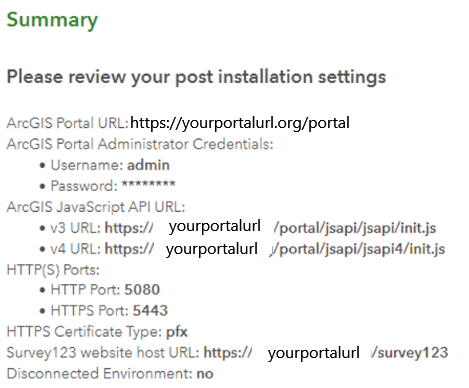
- Perform Post-Installation for IWA
- Portal URL: https://{yourportalurl}/portal
- Enter administrator credentials
- Leave JavaScript URLs as default
- Leave ports as default
- Select SSL cert type (pfx requires the known password)
- Add desired survey123 URL: https://{yourportalurl1]/survey123
The post installation sets up everything listed above, but requires an ArcGIS Enterprise administrator to manually add the Survey123 website host URL, https://<survey123website.domain >:5443, as a redirectURI to Portal to allow sign-in. To do this:
- Log in to the portal admin REST interface, for example:
- https://portal_webadaptorhost.domain/portal_webadaptorname/portaladmin
- Go to Security > OAuth > Get App Info, and enter the App ID survey123hub, and click Get App Info.
- Copy the contents of the response.
- Go back to OAuth and this time, go to Update App Info.
- Paste the copied response into the input box, making sure to add the URL that you will use to access your Survey123 website to the list of redirectURIs, and click Update App.
This may well include the reverse proxy access point if you intend setting one up, for example: https://survey123website.domain/survey123
- Repeat Step 2 to confirm that your additional redirectURI has been successfully added to the list.
- Survey123 website can be reached at this link: https://{yourportalurl}/survey123/
- Website configuration is finished!
Recent Comments